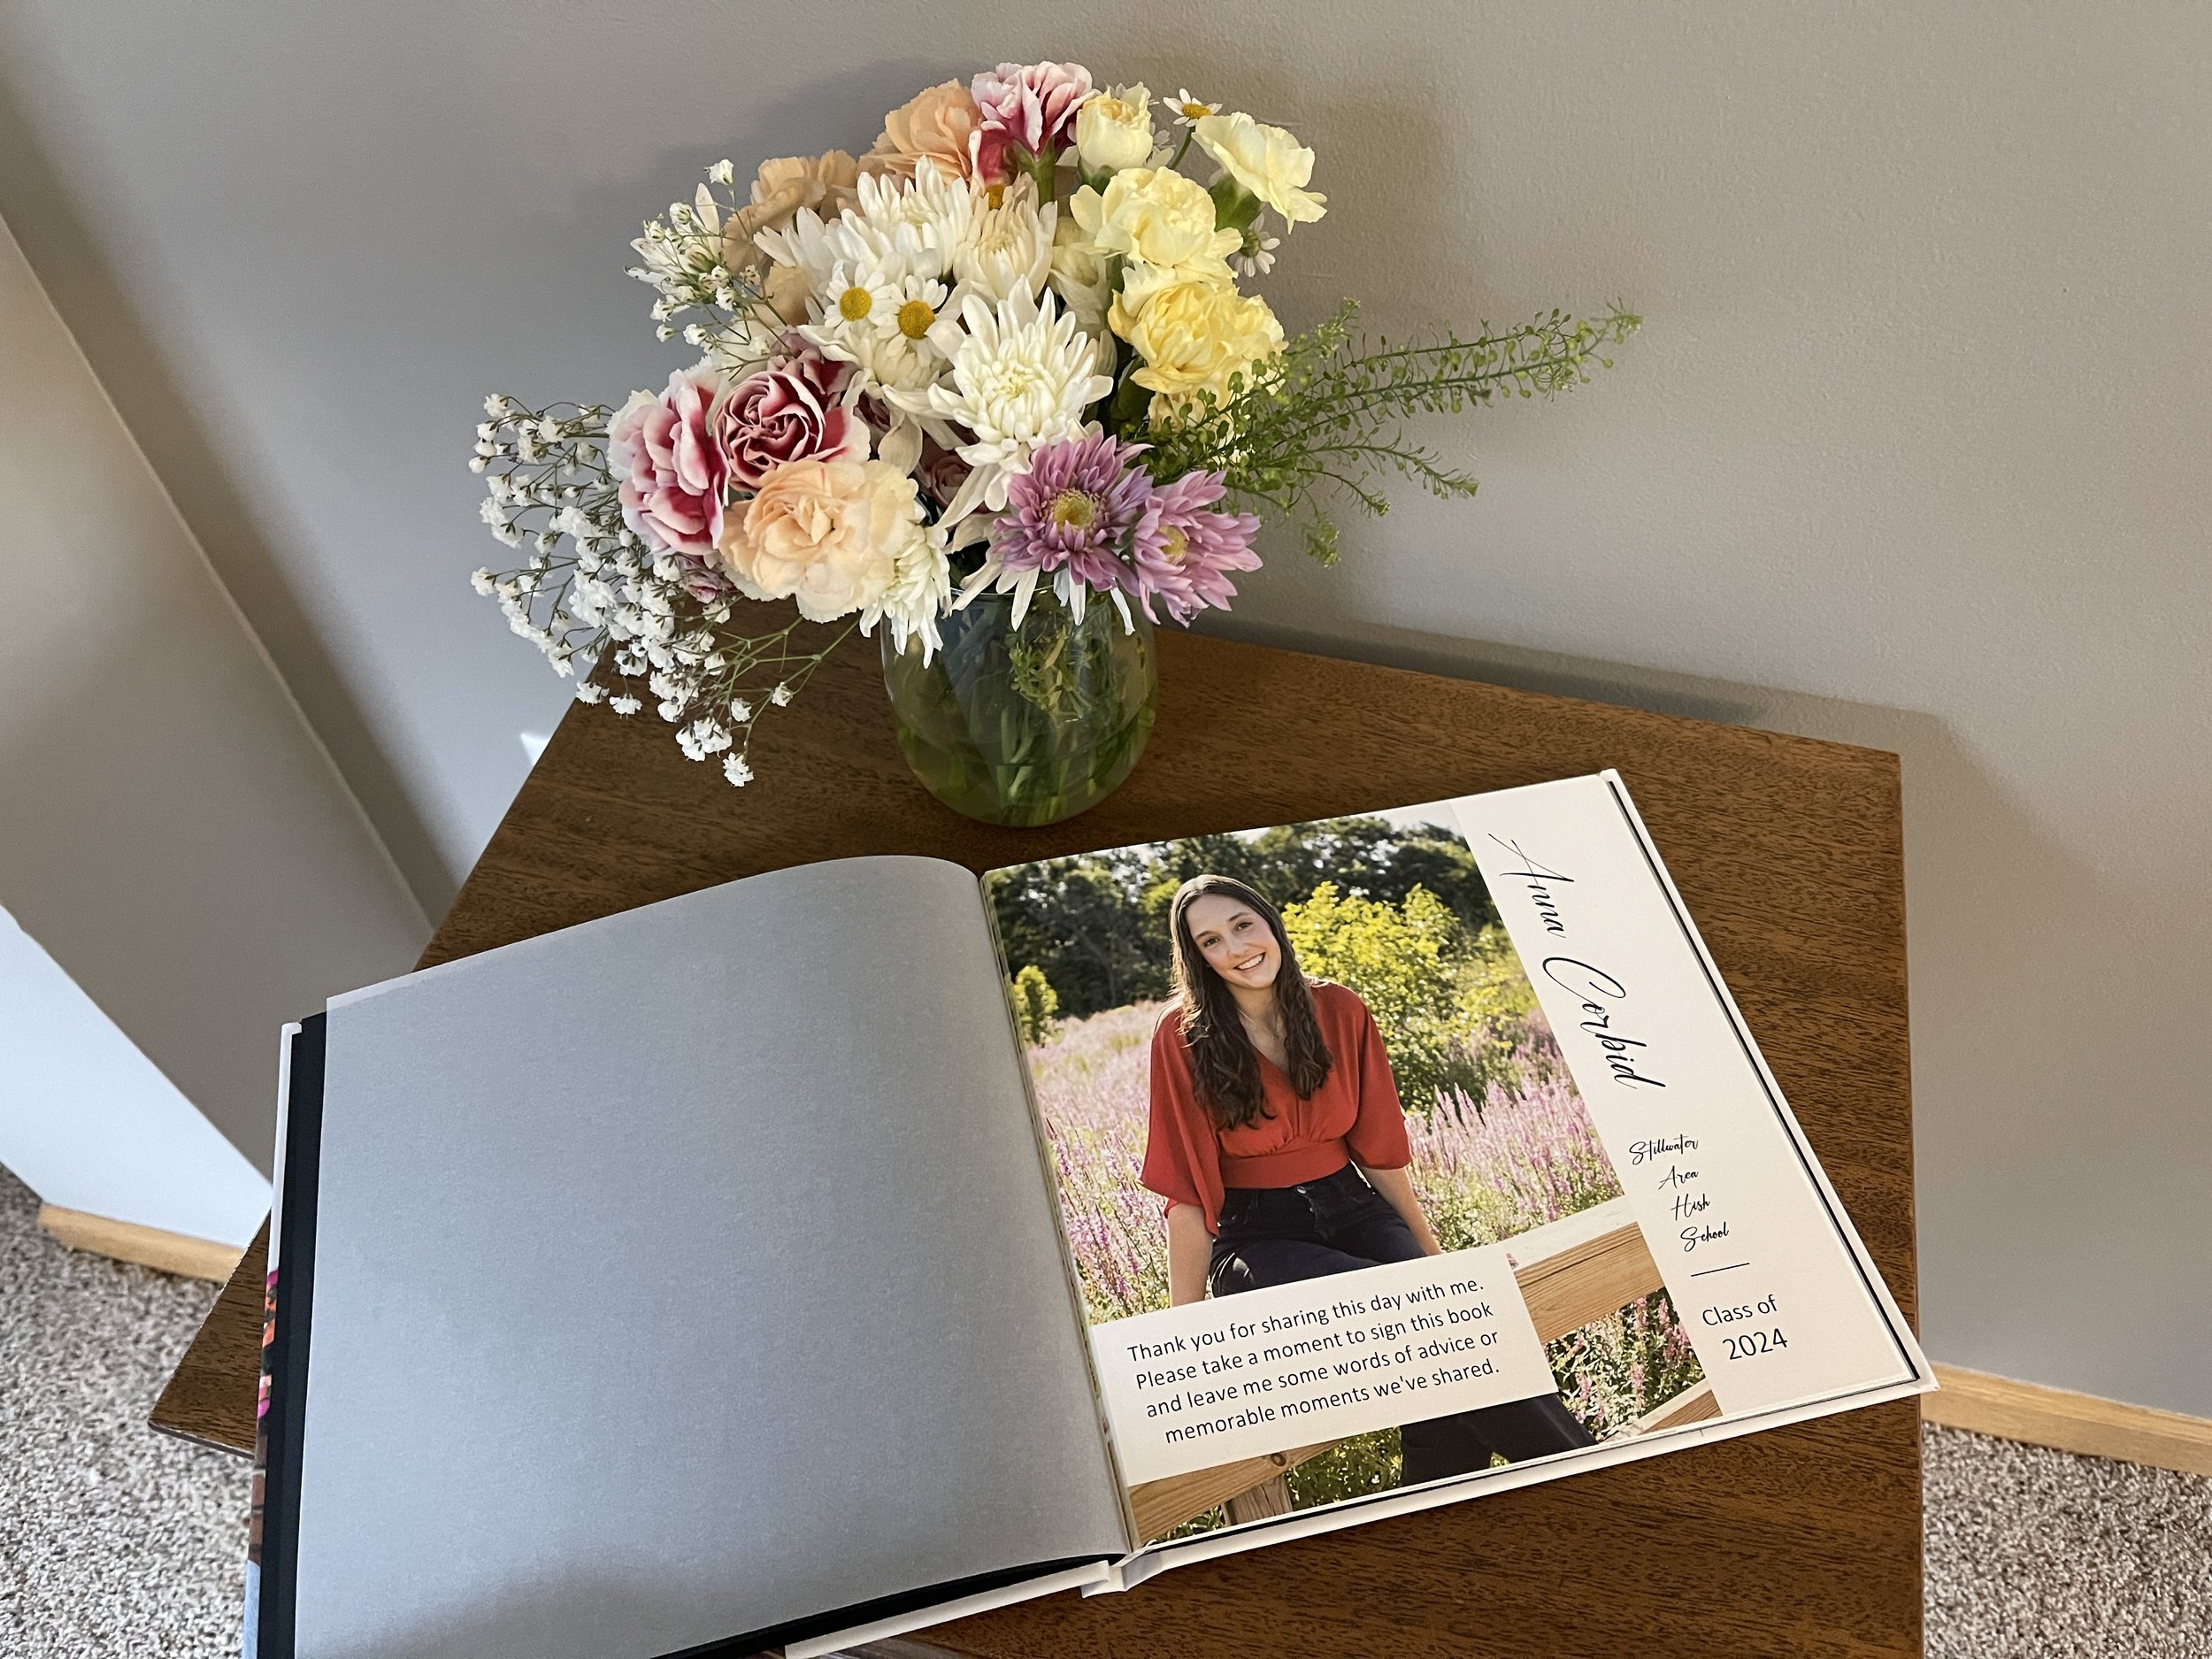
Tips for creating a photo sign-in guest book
Celebrations like graduation, a milestone birthday or anniversary, a retirement, a wedding, and a celebration of life are all occasions where we pull out old photos and memories to share and reminisce. I love a photo display, but I also love a keepsake, something tangible to have beyond the party, that can be enjoyed for years to come. One keepsake I like creating is a sign-in guest book customized with photos.
A photo sign-in guest book is simply a book that includes a series of photos selected specifically for the celebration, that guests sign to help us remember who attended. You can ask guests to just sign their name, leave a memory, or if it’s for a graduation or wedding, you can ask them to offer words of advice.
I’ve created these books for all of my children’s graduation parties, as well as for several clients. Here are a few tips:
1. Choose a theme…it will make it easier to select photos. Here are some ideas:
Select 1-3 photos from each year of life. This works well for graduates. You could also make it easy on yourself and just choose random favorite photos.
Select photos that include people that you expect to attend the celebration. That way, they can sign the page with their picture and enjoy that memory with you.
If you have a graduating senior who had senior pictures taken, create a book that just uses those photos. It’s a great way to enjoy and keep those beautiful photos you invested in a part of your life.
For weddings and anniversaries, you can choose photos from the couple’s journey, from the time they met, to the present.
For a retirement, you can choose photos with coworkers, locations he/she has worked at, as well as projects the retiree has worked on.
2. Choose up to 40 pics for a 20-page album. Don’t try to include ALL the memories. Sometimes it’s hard to make choices, but you need to leave space for signing. Having a theme will help you stay focused.
3. Leave LOTS of white space for people to sign and make comments in the design. Choose 1-3 pictures per page.
4. Include a note on the first page of the book that says something like: ‘Thank you for sharing this day with me. Please take a moment to sign this book and leave me some words of advice or memorable moments we've shared.’
5. Use a pen that dries quickly, and doesn’t smear or bleed through the pages. This is important! I like to use Staedtler Lumocolor permanent markers.
6. To create the book…you can use a simple design with a white background from your favorite digital photo album printer, find a digital photo book provider that has a predesigned Guest book layout, or custom design your own. My favorite DIY photo book printers for great quality are mpix and Mixbook.
7. Choose a layflat printed book…it’s easier to write on.
8. Put the sign-in book at the entrance of the celebration location and assign someone to encourage people to sign it.
Not only will this book tell you who was there to celebrate with you, but it will be a keepsake with memories you will treasure for years to come.
Overwhelmed with the thought of finding photos for a project? Getting started organizing your photos can be the hardest part! Grab our FREE GETTING STARTED GUIDE that includes tips for how to create a plan, how to take inventory of your collection, and provides the form to do it.
Holly Corbid is the Founder/Owner of Capture Your Photos, where we help you to organize, preserve, and share your lifetime of memories. Helping you touch hearts with your photos is our passion. We specialize in digital photo organization and work remotely with clients all over the country.
Looking for a DIY solution? Check out our series of online courses, The Photo Organizing Blueprint.
Find us at www.captureyourphotos.com or contact us here.


